marμX
- 1. Introduction
- 2. License
- 3. "Remote Mode" for GeniX Generator
- 4. Network Setup of GeniX Generator
- 5. Operations
1. Introduction

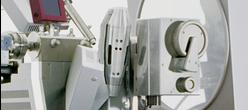
The "marμX"-page can be accessed by selecting the corresponding tab in the main window. Here, you can control the marμX generator (Xenocs "GeniX" source).
This page is accessible only if:
- MARMUX USE is given in the configuration file or if the program has been started with command line option +marmux.
- a valid license key has been given on the MARMUX LICENSE keyword in the configuration file.
2. License
The license key for using the marμX interface is a computer specific ASCII-string that you may obtain from marXperts GmbH. For this purpose you may run program 'marlicense' (typically contained in the automar program suite) on the PC where you wish to run program mar345dtb. Program marlicense is going to produce an output file called marlicense.$HOST which you have to maik to marXperts. If for some reason you don't have access to program marlicense, you can also provide the computer's hostname (as returned by command 'uname -n') and IP-address. In return, you will get a license key that you should put into the configuration file using keyword "MARMUX LICENSE", e.g. like
3. "Remote Mode" for GeniX Generator
The GeniX micro-focus generator can be controlled by a PC via a TCP/IP-socket interface. To use the generator in "remote mode", pins 5 and 7 on connector X03 on the back of the generator have to be bridged (see the GeniX manual for details). When operating the generator in "remote mode", the local control on the instrument itself is disabled, i.e. you cannot open the X-ray shutters on the instrument and you cannot turn on or off the X-rays. If the "remote mode" is enabled with the proper wiring of the X03 connector, you can still switch to "local mode" by setting the override key on the back of the generator in position "1". This procedure is possible only with X-rays turned off, so you cannot switch on-the-fly from "remote mode" to "local mode".
4. Network Setup of GeniX Generator
The controller of the GeniX generator makes use of the industry standard MODBUS/TCP-protocol for communication with a host computer. By default, the GeniX generator IP-address is set to 85.16.44.113 with netmask 255.255.0.0, but for use with the mar345dtb system the IP-address 192.0.2.100 with netmask 255.255.255.0 is used. The generator listens on port 502 for incoming connections. The Ethernet connector of the GeniX generator is located on the back of the instrument just above the main power cable. It is possible to change the IP-address via telnet. To do so, connect to the generator via telnet. If the controller still is in its default configuration, you will have to connect a direct line (cross-over cable) from your PC to the generator and set the PC's network card address to e.g. 85.16.44.1 You may then select to change the IP/Ethernet settings. Usually, it is sufficient to change the IP-address and netmask to fit your local network. The gateway address may be left as is. To save the changes, return to the main menu (R) and select "S" to save. You will be asked for a password. The default password is "USERUSER".
5. Operations
There are only 3 useful states of operation of the GeniX generator:
- X-ray OFF
- STANDBY mode
- FULL POWER mode
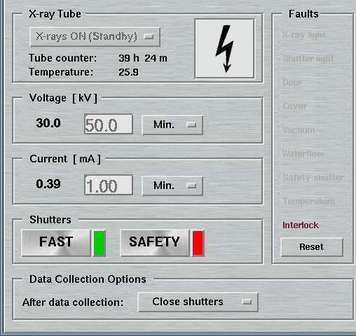
If the high voltage is turned on, in the upper control area on the left hand side you will see a "High Voltage" icon. If the generator is in STANDBY mode or at lower power, the icon will show a white background. At high power, the background turns yellow.
. If X-rays are leaving the generator, i.e. if the HV is on and the generator shutters are open, a yellow "Radiation" icon will show up on the right hand side of the push buttons for the shutters.
In the right hand side of the GUI, well defined hardware faults will be indicated in red fonts.
In the lower area of this page, you have a choice of taking special actions after finishing a data collection. Choose one of:
- Do nothing
- Close generator shutter
- Go into STANDBY mode
- Turn X-rays OFF
Likewise, if you don't plan to resume work for a couple of hours, you might as well turn off the X-rays at all.


